Showing posts with label Photography. Show all posts

Tuesday, July 02, 2024

God Damn Gundam

Let's talk Gundam.

I must confess, other than a bunch of cool robots (which I think are more mechanical suits than autonomous beings), I am not entirely sure what Gundam is, aside from a fictional universe that comes from the incredibly creative minds of the Japanese. 

I've never seen a Gundam themed show, movie, comic, novel, role playing game, or anything of the sort (Tho Google insists they exist, so they are out there... somewhere). However every single model shop I have ever been in has a large selection of Gundam models to choose from, so clearly somewhere out there is a very strong fandom for Gundam.

For me its just a bunch of cool robots.  As such, and being a kid at heart, I have bought many sets over the past few years, and last week I decided to built one of them.  Naturally it ended up in front of my camera.  So I give you:  The RX-87 model from the Gundam Universe... whatever that is.


(It just goes to show you don't have to be a major fan of a genre to appreciate the parts that interest you... go explore new things today.) 

While we're at it, here is a behind the scenes shot, just to prove this was made in my studio and not yours.


Sunday, February 05, 2023

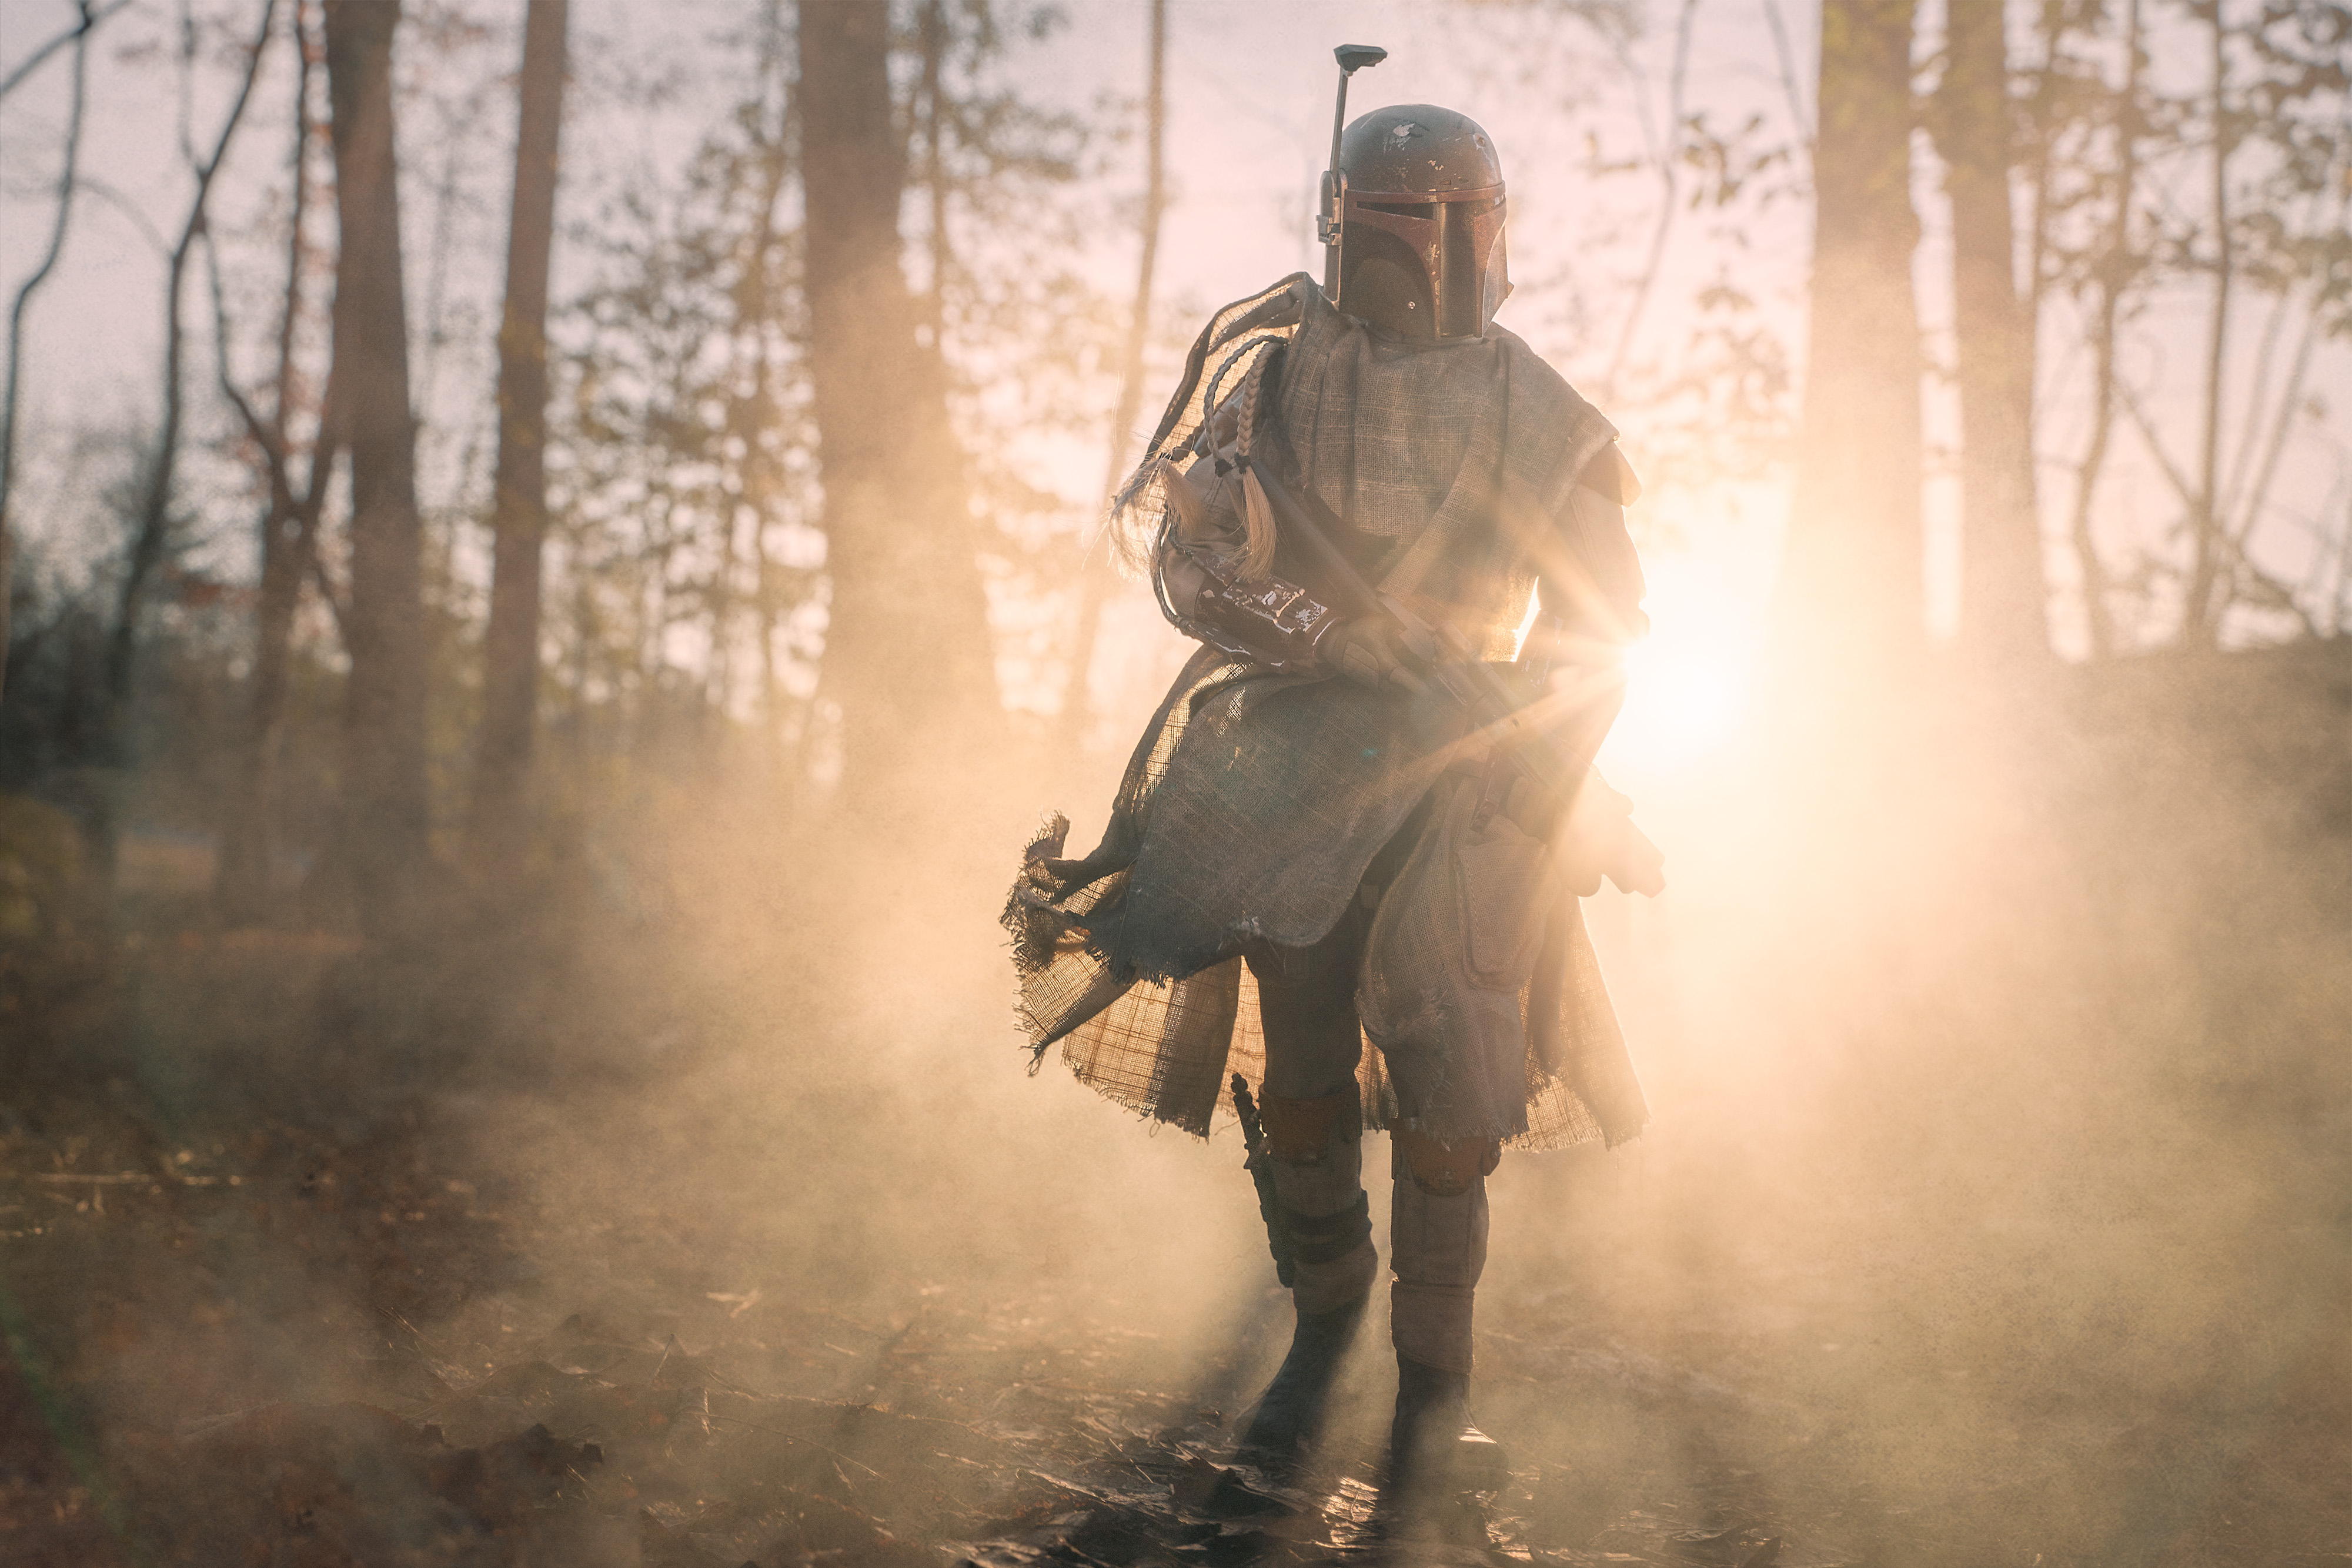
Boba Fett In The Mist

It is funny how inspiration strikes when you're not looking for it.


Took this yesterday on my local walking trail. I've walked that trail several dozen times now. When I walk it in the morning the rising sun shines through the trees. I've taken a few janky videos of it, but nothing serious. I never walk the trail with my camera bag, so I just use my cell phone most of the time.

I love walking it in freezing temps - it hardens up the mud, and I love wearing a hoodie with the hood up when I walk, which means the temps have to be cold, else I overheat. Friday evening, just before bed, I was thinking about the next day and how I was looking forward to hitting up the trail: how it was going to be well below freezing, and mostly sunny, so the sunlight in the trees will be excellent. Suddenly this image here formed in my brain, fully baked, with the mist, light, location. Everything.

5 minutes later I had my camera bag packed, and waiting by the door so I wouldn't forget it the next day for my hike.

The above image is the result.

Thursday, May 13, 2021

Photography Scavenger Hunt Round 31: Teal

 The 31st round of the Photography Scavenger Hunt is upon us.  This is my entry for the word "teal" 

Teal is a colour.  There is often a colour word in each round of the hunt, so I expected there to be one in this round.  Teal, however, isn't exactly in my normal creative colour palette, so I had trouble coming up with ideas for it.

Tea was also a hunt word this round, and my only thought was "Teal is just tea with an L".  This would become important when I was actually shooting my tea shot.

As I was shooting it, I thought I should just do the tea+l thing.  The idea that came to mind was making a Mrs Nesbitt Tea logo that was painted onto a brick wall - think of those old Coke signs painted on ye-olde shoppes - and having a character spray painting on an L.

So as I was shooting my tea shot, I also posed Buzz Lightyear to look like a spokes-spaceman for Mrs Nesbitts Tea.


I then took that image and processed it to look like a logo that was painted onto a brick wall.  Then I projected the image onto a TV screen and posed Deadpool with a spray can.


After that it was some basic comp work, and adding in some paint splatters.  The final result is here.


Wednesday, May 12, 2021

Photography Scavenger Hunt Round 31: Tiny Creatures

The 31st round of the Photography Scavenger Hunt is upon us.  This is my entry for the word "Tiny Creatures."

Given my genre of choice, tiny creatures should not present much a problem.  I mean, all I do is shoot tiny creatures.   I am literally surrounded by them.  That led to the idea of going meta and taking a self portrait with some of my tiny creatures.

I had actually considered taking some BTS photos of the setup, but neither myself nor my wife can locate them, so they are lost to the void of history.  So let me describe how I got this shot:

A simple setup, really.  I took this on my dining room table, with some black cloth on the wall to block out the window light.  I then setup my laptop, and arranged some characters. I set up one light, a 12" LED panel on a C-stand pointed straight in front of me pointing down at a steep angle.  I tethered my camera to my laptop.  This is one of the easiest shots I've done as I used the laptop I was staring at to remote control the camera, so I could literally watch the camera view as I clicked the shutter.

Easy, peasy.

This is the result.

It was only after I took the shot I decided to add the narrator windows, which look like Deadpool's inner-voice from the comics.  I dunno, I think it furthered the plot.

Photography Scavenger Hunt Round 31: Window

 The 31st round of the Photography Scavenger Hunt is upon us.  This is my entry for the word "Window" 

Window.  Its like a thing you can see out of... almost like a window to the soul, but not.  So I decided to make a self portrait with a window to my soul....

I tried mocking up something, and immediately hated it.  I mean, can you blame me?

I think I could beat that idea into submission, but it would take a whole lot of work (I even started making a window out of balsa wood to serve as a better mind portal).  However his was about a week before the deadline and I was losing steam.  

So in desperation I looked up to the My Little Pony on my shelf (fun fact: first Christmas I shared with my now-wife, then girlfriend, she asked me what I wanted, and I said "a pony" so she got me a My Little Pony doll.  I had no choice but to marry her after that) ... and inspiration struck. 

My Little Ponies have designs on their asses - they call em cutie marks, I call em ass-tattoos. Throughout my brainstorming for window I kept getting flashbacks to my PTSD inducing IT days brought on by that damnable Windows OS. So doing the math:  pony ass + logo == good enough!

And by definition good enough is good enough, so I grabbed the pony, took it outside and tossed it on a small concrete block retaining wall in my back yard, positioned it for the then setting sun, and started shooting.

One of the straight-from-camera shots looks like this:

Good enough actually turned out to be not that bad at all.  The location was right in front of a chain link fence, and the neighbours house was on the other side.  This made the background a horrid mess (for the shot, the neighbours yard actually looks quite nice).  I played around with a very shallow depth of field to blur all that crap out, and I was left with a rather pleasing photo. 

I tossed a Windows 2000 logo on its ass, and called it a day.  This is what I submitted to the hunt:

Saturday, May 08, 2021

Photography Scavenger Hunt Round 31: Float

The 31st round of the Photography Scavenger Hunt is upon us.  This is my entry for the word "Float"

I knew pretty much right away that I wanted to have Deadpool floating in a pool of some sort.  I just didn't know how to do it.

I googled doll sized pool floats and was pleasantly surprised to find that, not only do these things exist in the scale I needed (1/6 scale), but there were tons of options at reasonable prices.  Turns out they are also used as floating drink holders.  I picked a pack that looked the most like what Deadpool would want, and two-day shipped those suckers post haste!

There is a pond in a walking park near my house that I thought would be perfect for this sort of floaty scenery.  I took this photo on a scouting mission:


Before I sent my $200 Deadpool figure floating across a pond, I wanted some assurance I'd get him back in once piece.  So I tied some fishing line to the float so I could hold on to him from the shoreline.

And I tied Deadpool to the float with some more fishing line. I tried to position the line so it wouldn't be in the shot, but it would be easy enough to remove in post if some of it snuck in.

All I needed was to wait for the right time and go take the shot.  I waited out a rain storm and the first time the sun came out I grabbed my wife (as an assistant) and my kids (for play time) and headed over to the park.  I tossed the float onto the water and....  it worked!  Well, except for one thing: damned dirty nature.

This was the height of spring, and the local trees were flowering...so the pond was full of flower petals.  As a result my float was covered in nasty nature dandruff!  Way, way, (way!) too much to Photoshop out.

I packed up, retreated, and bided my time.

[not pictured: me biding my time]

As Hamilton once sang "I'm not gonna miss my shot." (also "Holy shit, Burr shot me!"- Hamilton is one crazy mofo) 

I was in the park taking my daily walk a week later and noticed the pond was much clearer, so I grabbed my wife again and rushed over.  This time things were almost perfect.

I got my shot...
... and Burr didn't shoot me.  So I got one up on Hamilton.  Go me.

Thursday, May 06, 2021

Photography Scavenger Hunt Round 31: Ink

The 31st round of the Photography Scavenger Hunt is upon us, and the first word this round is "ink".

When I started brainstorming words around ink I quickly settled on the idea of an old-timey writing... thing... of some kind.  An old quill writing on a scroll, or something similar.  I couldn't really nail down exactly what I had in mind.   That is until the COVID gods smiled upon me.

Almost 2 years ago I ordered a Gandalf 12" figure.  It was delayed at first by normal reasons (as top end figures often are), but then it was delayed again by COVID-19 and its horrible effects on global commerce, especially from China.  

This figure is pretty dang detailed.  Real hair, detailed props, real material on the robes, cloak, and hat... even the eyes moved.  The eyes were posable!  I mean, damn.  
Image from Asmus Toys 

A week into the hunt I was notified that this amazing Gandalf was finally shipping. When it arrived a few days later it did not disappoint.  It was everything an action figure photography nerd ever wanted in a model of one of the most interesting characters from the fantasy realm.   

It also helped solidify my brainstorming as Gandalf has many scenes where he is looking at old parchments.  So I decided to do one of those, but with a twist: Gandalf reading a modern click-baity article but in an ancient library setting.

The first thing I did was write out a scroll.  I wanted it to be a mix of modern and ancient so I made two scrolls - one was a fake click-bait article on the best inks, and the other was an old-timey story - in fact it was just the first few sentences from The Hobbit, in a Lord Of The Rings font.

I printed off the scrolls onto basic printer paper, and then set about aging it.  I first started with some washes made from actual inks, bit I didn't like the effect - it was too aged - like a bad Photoshop job (only *I* am going to do bad Photoshop on *my* images - its only fair).  So I went with the tried and true method... tea.

I cut up the printed paper into scroll sized bits.  Then brewed a strong batch of tea (Earl Grey, if you must know). Then I soaked the paper in the tea, laid it out on a baking sheet, and dried it in the oven (240f, 5-10 minutes until golden brown).
I needed to populate an entire library, so I cut up a whole pile of paper and gave it the tea treatment. Some of the paper I cut to be left as sheets of paper, others intended to be made into scrolls. It took me several hours (an entire NHL game to be precise - Leafs lost, those bastards!)
Once I had my aged paper I set about making the long strips into scrolls.  I started by rolling them up over a  BBQ skewer. (I did this during a monthly Scavengers hangout, so if you wondered what that rustling from my mic was - it was my scroll factory).
Then I beat up the edges with a knife blade, to give it that old torn look.
Rinse and repeat until I had a pile of scrolls ready at my disposal.
All that was left was to set up the scene and take the shot.  I put the main scrolls on a scale work bench I made for a different shot for this round of the hunt (details coming up in a follow-up post).  I used a fake brick background I had lying around for the wall, and a couple un-fake bricks to act as a shelf behind Gandalf.  Toss in a mess of papers, scrolls, and an old book into the background.  Add a couple Lume Cubes to provide light, and a scene was born.
The final shot looked like this.  All in camera, except some cleanup of errant dust and hairs, and a healthy dose of colour correction.

 If you are wondering what that click-bait article said, here is the full text:

10 Best Inks For Wizards That Will Surprise You

1. Elvish Magic ink

The ink made from the tears of Galadriel mixed with the finest Mallorn tree nut juice.

2. Dwarvish Tunnel Ink

Deep in the Mines of Moria is a vein of black tar that makes an ink that flows smoothly out of your journaling pen.

3.  Hobbit Pipe Weed Ink

Made from the drippings of Old Toby, and perfect for genealogical records.

4. Orc Blood and Copper Sulfate

The blackest blood purified by the magic powder makes an ink so dark it will steal your soul and make you long for the better days.

5. India Ink

Available at Staples.com, use promo code “RADAGAST” for free shipping!

Friday, October 23, 2020

Photography Scavenger Hunt Round 29: Round

 The 29th round of the Photography Scavenger Hunt brought some interesting limitations:  no Photoshop.  None.  Every image must be straight out of camera.  For someone as Photoshop heavy as me that presented some interesting challenges.  It meant I had to build my worlds in real life, instead of in Photoshop.


This is how I built the world for the word "round."

The concept was the knights of the round table.  As I remember the story, all the knights at the round table would place their swords on the table, facing in, as a sign of... whatever the sign was - I am not a knight - I don't even play one on the Internet.  At first I envisioned a simple scene of a wooden table with swords facing inwards.  I then expanded it to show a kingly figure at the far end of the table.  

When I went looking for sword props online I soon realized that the only good looking miniature swords were from Game of Thrones.  I bought a bunch of those.  It did trigger the thought of mixing the King Arthur legend with Game Of Thrones, and having the round table be in front of the Iron Throne.  

Of course, being me, Deadpool would be the king, and while all the other swords were medieval ones, his swords would be his classic katanas (fun fact, they are named Bea and Arthur).

I set about building a round table out of XPS foam (my diorama weapon of choice).  I needed a rather large table - about 18" to accommodate the swords, which are themselves about 8" long.  Making circles is hard, so I had to improvise a jig to get something close to a circle (it ended up working well, over all).

Once I had the table built, I needed to kingify Deadpool.  I started by making a crown, based off of King Joffery's crown from Game of Thrones, out of cereal box cardboard (Shreddies, if you must know) and some metallic paint.
I then raided (by raided I mean asked nicely, and was given) my wife's stash of fabric for some faux-fur to make a kingly robe. I didn't have to worry about everything, as the shoulders is all that would be in the shot. This is what I managed to create.  For scale, the Deadpool figure is 12" tall:

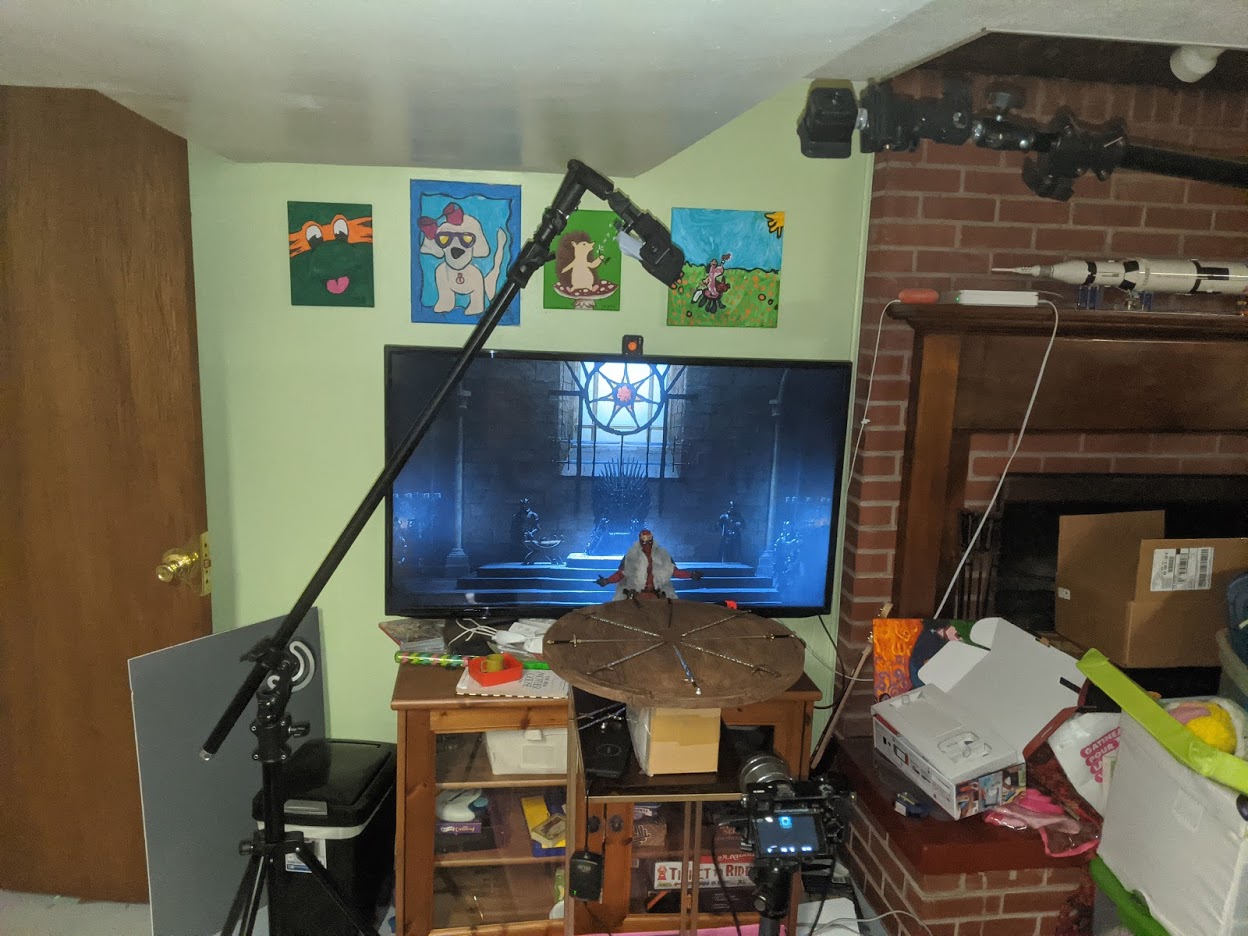
The it was a simple matter of setting up the scene in front of my TV, and having it display a screenshot from the show showing the throne room.  I set up some lights on stands over the models.  I also tossed a Lume Cube on the top of the TV to add some back light.  

The light placed on the TV provided some interesting properties in that it caused flaring on the lens that looked like sun rays.  I decided that this was a happy accident and kept them for the final shot, composing things so the rays looks like they were coming through the window.  This is the straight out of camera shot I submitted to the hunt:

I was pleased with how this came out, but I knew some Photoshop magic would really bring this image to life, so as is my custom this hunt, once I submitted the SOOC image, I processed it further to give the image my own personal touch and style.  This is the final result:

Interesting fact, the first concept I had was an android holding the moon. However I had no idea how to create that in the real world with the tools and time available to me.  I did create that shot using Photoshop tho. It looks like this:


Thursday, October 22, 2020

Photography Scavenger Hunt Round 29: Boats

 The 29th round of the Photography Scavenger Hunt brought some interesting limitations:  no Photoshop.  None.  Every image must be straight out of camera.  For someone as Photoshop heavy as me that presented some interesting challenges.  It meant I had to build my worlds in real life, instead of in Photoshop.


This is how I built the world for the word "boats."

The concept for this changed over the course of the hunt.  At first I wanted to do a boat being paddled by a skeleton, escaping a damaged pirate ship (ya know, as skeletons do).  But I realized the logistics of making that shot happen all in camera was way to much for what I was willing to do.

I even made a boat to use out of XPS foam:
I even carved paddles out of gigantic popsicle sticks:

When it came time to shoot I realized I'd need a body of water, and I didn't really have a good one handy.  I do have a blow-up pool, but using that would put my camera at risk from water damage - plus by the time I got around to being ready for shooting the weather was getting colder, so being in a pool at night (my shot was a night shot) was not appealing.

I decided to scrap the concept completely and shift it to a shipwreck scene.  There are many real world examples of shipwrecks being entirely on land, so I didn't have to mess with real water.

I had already purchased a cheap pirate ship model for the original concept that I could reuse.  I just needed a scale beach for it to wreck on.  Enter XPS foam!

I started by making the base of the scene.  I wanted the ship to be washed into a sandy hill, so I built up some terrain with foam.  I imagined the ship wrecking as it went into an inlet, so I added some land on the far side.

For the water itself I needed an indentation in the foam. To get that I used a property of spray paint that is normally annoying with foam:  the propellant melts XPS foam.  This sucks if you accidentally melt your finished product, but it also can be used to make interesting patterns in the foam that is perfect for the bottom of a river. 

I used clear coat to spray the foam in strategic locations to get an inlet type water structure going.

Then I grabbed some scraps to rough out some landscapes.  I wanted the ship to be washed against a pile  of sand.  I would use actual sand later, but I needed an underlying structure for that pile. Hence the square foam blocks.


Then I covered everything in Sculptamold (paper based modeling putty, basically).  This allowed me to turn the rough square landscape into something more natural. I did leave a slit in the foam where the boat would rest, half-buried in sand over time. I then covered the beach in playbox sand I liberated from my kids sandbox. This is done by covering everything in white glue then sprinkling on the sand.  Once its dried I sprayed on a wash of (roughly) 1/5 glue/water, which sealed everything in place - the finished piece is actually rock hard once it all dries.

The water effect is simply 5 minute epoxy that had a couple drops of blue paint in it (you need a surprisingly small amount of paint for this - a few drops for 5oz of epoxy is more than enough). It took two batches,  total of 10oz of epoxy,  to cover everything.  This next shot is after the first batch:


The next step was to make the pirate ship look old.  I started by breaking a couple of the mast bits that hold the sails.  Then I Dremel'd a hole in the bow of the ship.  Once the structure was wrecked, I spray painted the whole thing black.


After that I painted up the ship using basic craft paints, first to look like it was new, then weathered it so it looked old, adding extra greens and browns to look like lichens and molds.

Once the ship was ready to go, I took the whole assembly and put it in front of my TV.  To add ambience I put an image of the Milky Way on the screen.


If you notice, the lights from the room reflect on the TV screen, and the camera picked those up really well.  So I had to turn those off and use Lume Cubes placed well off to the left side.  This gave me a very low light to work with, so I had to use long exposures to get the shot.

I found that the best look was from using my hand to mask out the sand from the lights for most of the shot, only letting it through for the last couple seconds of the exposure.  This made the ship brighter in frame and stand out more.  I also had to turn the brightness of the TV way down otherwise the background would wash out - not something most people normally have to deal with when shooting the Milky Way.

After a bunch of trial and error with timing, I finally got this shot with a 15 second exposure:

That is the shot I submitted to the hunt.  I was super pleased when I got this shot.  I tried to remove some of those small white reflections from the back of the boat, and along the far shoreline, but I couldn't figure that out, so I left it.

Now that the hunt requirements were done, I was free to process the image to my hearts content.  There is a lot of dodging and burning, some adjustments of light intensity in the stars, and cleaning up of some stray reflections from the TV monitor I didn't notice in the first image. 

This is the final result:


Wednesday, October 21, 2020

Photography Scavenger Hunt Round 29: Metal

 The 29th round of the Photography Scavenger Hunt brought some interesting limitations:  no Photoshop.  None.  Every image must be straight out of camera.  For someone as Photoshop heavy as me that presented some interesting challenges.  It meant I had to build my worlds in real life, instead of in Photoshop.


This is how I built the world for the word "metal."

This was actually the easiest shot I did this round.  The concept I had right away was someone throwing up the horns: the classic rock and roll symbol anyone who has been to a rock concert knows intimately.  I had a Deadpool figure that came with his hand in that pose, so it was simply a matter of setting him up in front of a background and shooting him.

This is the straight from camera shot I submitted to the hunt:

This is the image after I processed it:


Tuesday, October 20, 2020

Photography Scavenger Hunt Round 29: Path

 The 29th round of the Photography Scavenger Hunt brought some interesting limitations:  no Photoshop.  None.  Every image must be straight out of camera.  For someone as Photoshop heavy as me that presented some interesting challenges.  It meant I had to build my worlds in real life, instead of in Photoshop.


This is how I built the world for the word "path."

I came up with the idea for using an Indiana Jones type figure going on a quest and encountering a skull cave right away. Whenever I think path my first thoughts are a path through the woods, which makes me think of either Lord of the Rings, or Indiana Jones.  I own a Kermit the Frog figure dressed as Indiana Jones so the Indiana/LotR choice was made for me.  It was just a matter of building a background to fit.

I started by taking a skull left over from last years Halloween decorations, and making a rock wall to fit it in, all out of XPS foam.  I also used some left over foam bits to make some rocks in the foreground.

I used some drywall compound to smooth out some of the edges and fill in some gaps. After that it was a simple mater of painting the foam to look like rocks.  I added some extra texture to the path, and made it browner to look more like mud, however thats hard to see in the final image.

I made a map out of muslin, aged with some brown and black inks, then drew on the map elements with a Sharpie.

When I put it all together and set up my camera, I sprayed some Atmospheric Aerosol into the scene to give a foggy mood to it.  The result, straight out of camera, looked like this:

I processed the image after I submitted it. The changes were minimal, mainly some cleanup of dust spots and visible joints on Kermit, as well as some colour adjustments and dodging/burning.  The final looks like this:


Monday, October 19, 2020

Photography Scavenger Hunt Round 29: Broken

 The 29th round of the Photography Scavenger Hunt brought some interesting limitations:  no Photoshop.  None.  Every image must be straight out of camera.  For someone as Photoshop heavy as me that presented some interesting challenges.  It meant I had to build my worlds in real life, instead of in Photoshop.


This is how I built the world for the word "broken."

The concept I wanted to use was the comic book cover for the Death of Superman issue.  It featured his ripped cape on a pole. Looks like this:

I started by making his cape.  Starting with a template of Supermans S logo cut out of cardstock, I experimented with different fabric dyes and paints to see how to make the best cape. I started with fabric markers, but they tended to bleed a lot, were uneven in colour, and generally made a mess of things.

Then I tried fabric spray paint, and that worked really well.  I glued (using kids crafting glue sticks) the logo to a piece of yellow fabric from my wife's quilting stash, then sprayed the whole thing with red fabric paint.

When I removed the stencil (which was easy as the glue had a very weak bond - its intended for paper, not fabric), I was left with a very passable cape.

Perfect!  Now to destroy it!  

I used a mix of wire brushes, nails hammered into boards, and other implements of destruction to shred the cape to look similar to the comic cover.

The next step was to make a big pile of rubble.  I used my favourite diorama material, XPS foam, for this.  I cut a bunch of concrete bricks - 1"x 2" painted them up to look grey, then glued them all in a pile.  I also made a couple broken I-beams, to give that fresh "fallen from a building" look that is so in vogue these days.  I grabbed a dead branch from outside to act as the pole. 

I then tossed the whole thing in front of my TV, and had it display a sky scene. Added some lights to catch the details in the rubble pile, then took the shot.

This is the straight from camera image I submitted to the hunt:

As is my custom for images from this round I post-processed the images after I submitted it to better match my Photoshop-y style.  At first I applied some colour balancing to this image, and called it done.  However I realized I really didn't dig the style of the image - it just didn't fit my vision.  I think part of it is the background sky - I'm just not a bold colour sort of guy.  What the hell were you thinking using that sky, past me?!?

So my processed shot is a complete redo.

I reshot the same pile of rubble and the same cape in my lightbox.  Then I composited in some ruined buildings I downloaded from PixelSquid.  I added a sky from my archives, and added some textures and smoke effects.  This is the vision I actually had in my head:


In other news, after making this image I decided to re-read the series.  All 63 comic books of it.  So I have been going through it online at dcuniverse.com.  Good stuff, comic books.  I wasn't much of a reader of them back in the day, but recently it has become one of my favourite literary forms.